Meta Gyro Tilt - Faking a Ray-Ban Meta POV in the Browser
How I turned any JPG into a 3024x4032 Ray-Ban Meta frame with pure browser Canvas, EXIF surgery and a little gyro math, and what building a 100% local, Instagram Story ready converter taught me about images, privacy and shipping tiny tools.
Meta Gyro Tilt - Faking a Ray-Ban Meta POV in the Browser
Try it live: gyro.10akhil-t.workers.dev | Source code: github.com/silky-x0/meta-gyro-tilt
Little Personal Story
This started in a pretty embarrassing way. A friend showed me his Ray-Ban Meta Story, that slightly tilted, immersive POV that just looks like you are seeing through glasses, and my first thought was, can I fake this without the glasses?
I had a random photo from my phone, a hacky idea for testing an image pipeline that validates Make: Meta AI and PixelXDimension: 3024, and a free weekend. The first version was literally one index.html with a <canvas> and a CDN piexif.js. It worked, but the horizon was sideways. Then it stretched faces. Then it leaked GPS into the output on Instagram.
That sideways horizon is where the name came from, meta-gyro-tilt. Phones do not store tilt in the pixels, they store it in EXIF Orientation (1 to 8). If you ignore it, you end up shipping a sideways Story.
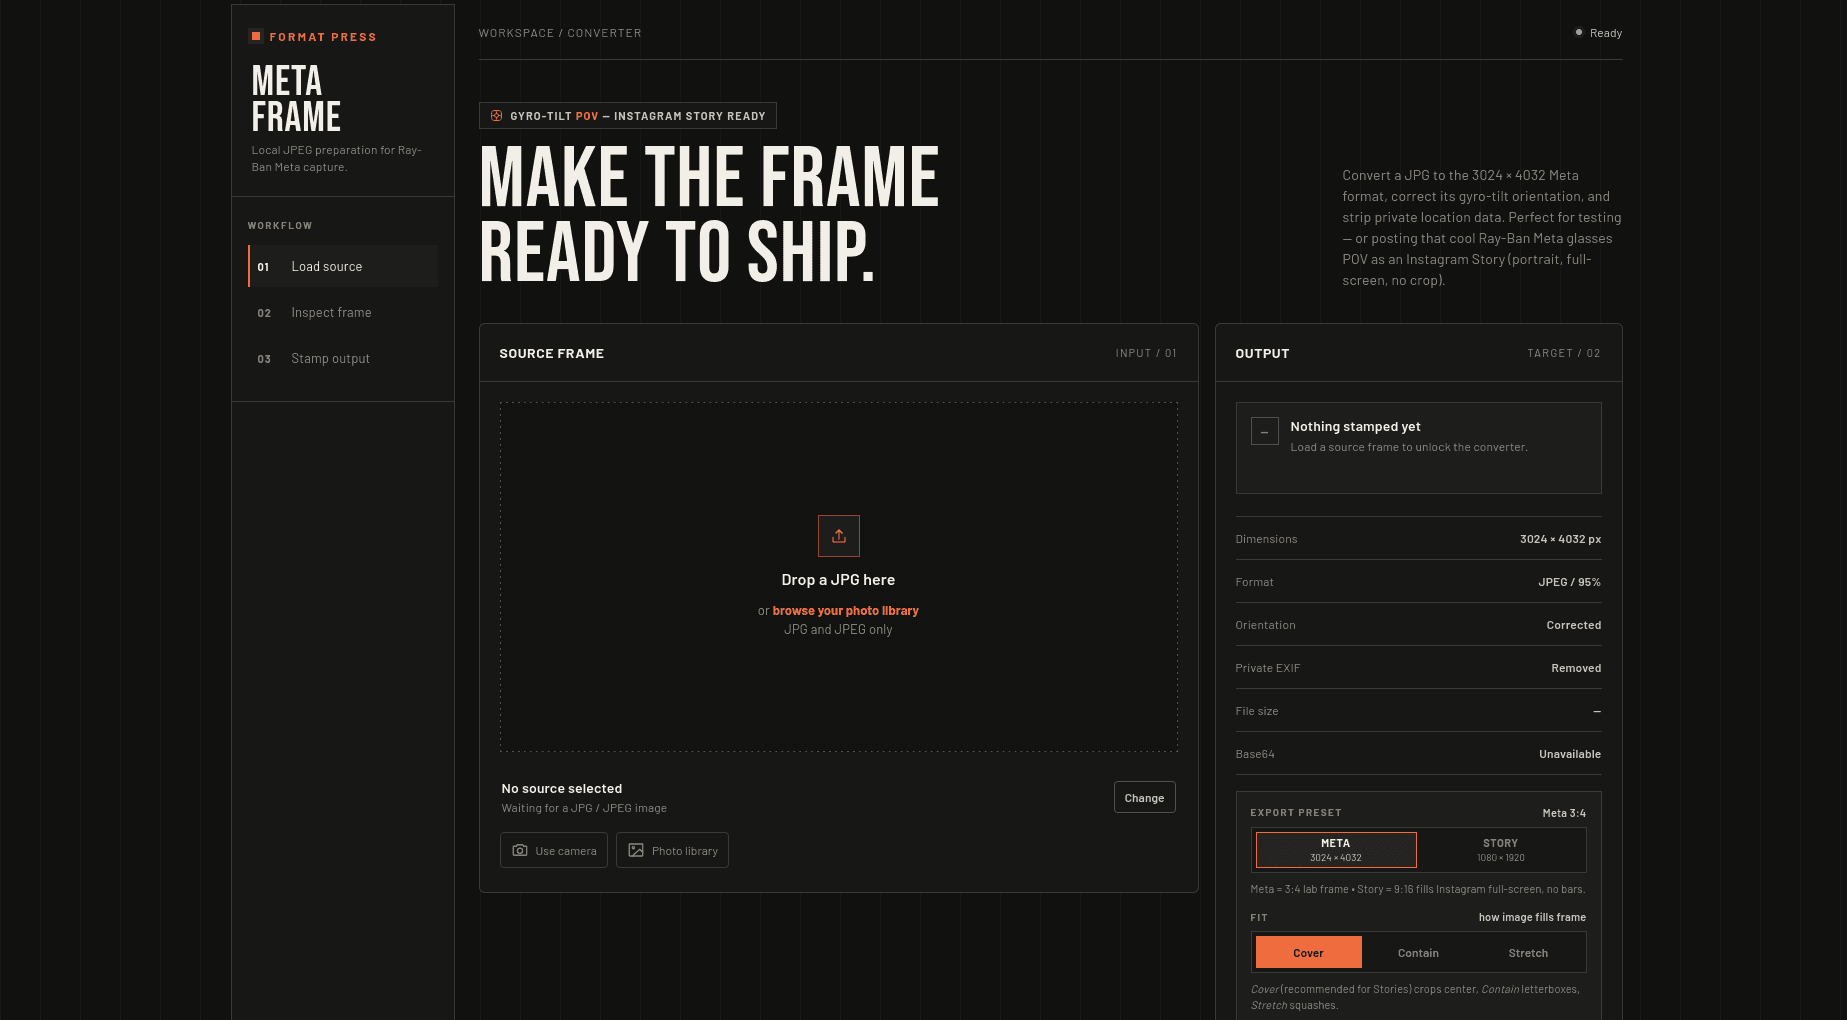
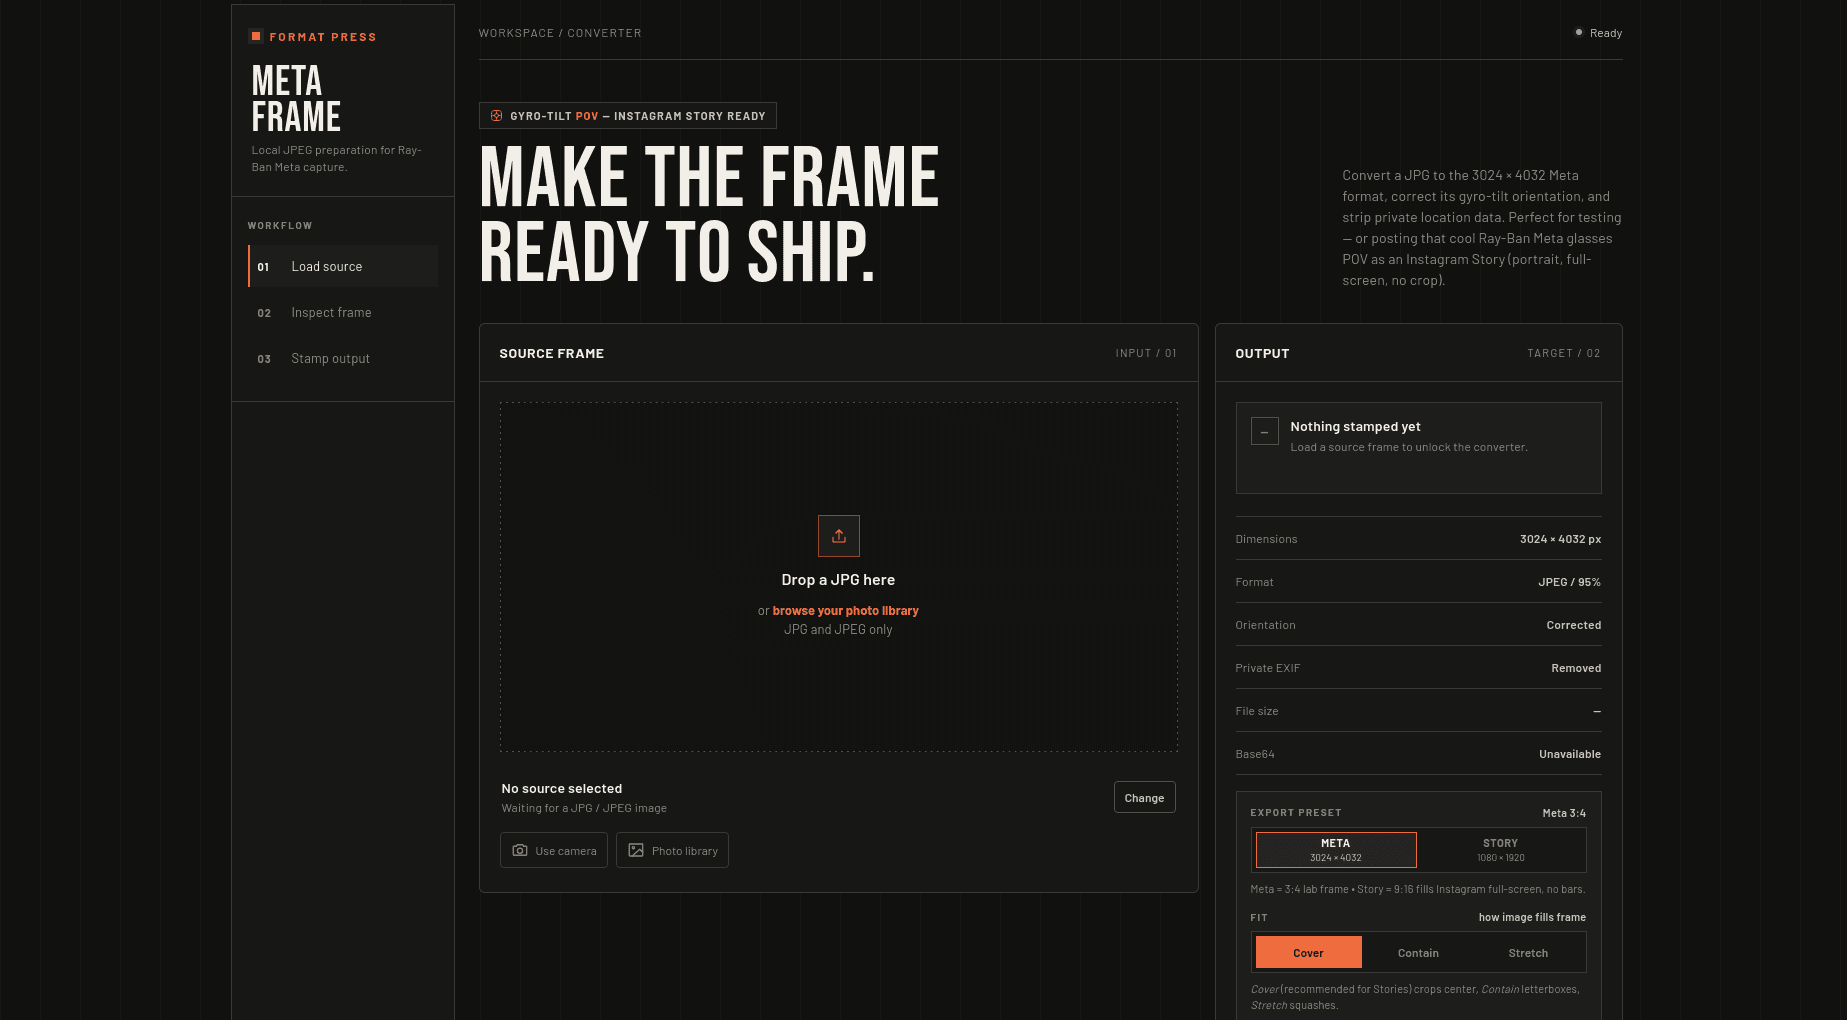
So I rebuilt it properly as a single file, zero backend Format Press. Just drop any JPG, it corrects the gyro, resizes to 3024×4032, strips private EXIF, stamps the Meta tags and lets you share straight to Instagram Story. Everything runs 100% in the browser. Nothing gets uploaded.
It is testing only, unofficial and experimental, but it taught me way more about images than I expected.
What is Meta Gyro Tilt?
At its core, meta-gyro-tilt is a local image normalizer:
Take any JPG in any orientation and any size, correct its gyro tilt, resize to
3024×4032at 95% JPEG, wipe GPS and private tags, stampMeta AI / Ray-Ban Meta Smart Glasses 2and export as JPEG plus pure Base64.
Think of it like this: instead of uploading to a server that fixes your photo, the browser becomes the darkroom. FileReader loads the negative, Canvas 2D corrects it, piexifjs rewrites the label, and nothing ever leaves your device.
Who is this for? Basically three use cases:
- You want a Story ready POV without buying the glasses.
- Your pipeline needs deterministic
Make/Model/PixelXDimensionfor QA. - Your privacy matters and you do not want to leak
GPSjust to post a Story.
You can try it yourself here: Live Demo and the full code is on GitHub.
The Three Main Pillars of Format Press
Every conversion relies on three building blocks, kind of like how EDA has Producer, Bus and Consumer.
1. Input & Preview (The Loader)
This is the announcer. It only accepts JPG/JPEG by design because Meta's pipeline is JPEG. It validates MIME plus .jpg/.jpeg, guards against OOM with a 15 MB limit, and shows an instant preview.
// index.html:1482 - the gate
if (file.type !== "image/jpeg" && !/\.jpe?g$/i.test(file.name)) {
  showStatus("Please choose a JPG - PNG/WebP are not supported", "error");
  dropZone.classList.add("error");
  return;
}
if (file.size > 15 * 1024 * 1024) {
  showStatus(`Too large (${formatBytes(file.size)}). Max 15 MB`, "error");
  return;
}
preview.src = await readAsDataURL(file); // FileReader
Three entry points map to two hidden inputs: fileInput for the library and cameraInput with capture="environment" for mobile. Drag and drop, click, and keyboard (Enter/Space on the dropzone) all funnel to handleFile().
2. Correction & Stamping (The Darkroom)
This is the bus where the actual gyro math lives.
a) Read orientation
// index.html:1558
function readOrientation(dataUrl) {
  try { return piexif.load(dataUrl)["0th"][piexif.ImageIFD.Orientation] || 1 }
  catch { return 1 }
}
b) Draw corrected using Canvas 2D setTransform() for all 8 EXIF orientations plus an optional ±15° manual nudge and cover/contain/stretch modes:
// index.html:1586 - the heart
switch (orientation) {
  case 6: ctx.setTransform(0, 1, -1, 0, targetH, 0); break; // 90° CW
  case 3: ctx.setTransform(-1, 0, 0, -1, targetW, targetH); break; // 180°
  // ... 1,2,4,5,7,8
}
if (tiltDeg) {
  ctx.translate(canvas.width/2, canvas.height/2);
  ctx.rotate(tiltDeg * Math.PI / 180);
  ctx.translate(-canvas.width/2, -canvas.height/2);
}
// cover = center-crop (best for Stories), contain = letterbox, stretch = squash
Then canvas.toBlob(..., "image/jpeg", 0.95) which is async and has lower peak memory than toDataURL.
c) Rebuild EXIF to wipe private data and stamp Meta:
// index.html:1664
exif.GPS = {};
delete exif["0th"][piexif.ImageIFD.Software];
delete exif.Exif[piexif.ExifIFD.MakerNote];
exif["0th"][piexif.ImageIFD.Make] = "Meta AI";
exif["0th"][piexif.ImageIFD.Model] = "Ray-Ban Meta Smart Glasses 2";
exif["0th"][piexif.ImageIFD.Orientation] = 1;
exif.Exif[piexif.ExifIFD.PixelXDimension] = 3024; // or 1080 for Story
exif.Exif[piexif.ExifIFD.PixelYDimension] = 4032; // or 1920
Finally piexif.dump() plus piexif.insert() glues the new EXIF onto the corrected JPEG. We get both data:image/jpeg;base64,... and pure Base64 with split(",")[1].
3. Export & Share (The Shipper)
This is the responder. Copy Base64 prefers navigator.clipboard.writeText with an execCommand fallback. Save / Share tries navigator.canShare({files}) then navigator.share({files}) (on iOS/Android this shows Instagram -> Story), otherwise it falls back to a URL.createObjectURL download. File name adapts too: meta-glasses-3024x4032.jpg vs meta-story-1080x1920.jpg.
Here is what a stamped EXIF looks like:
{
  "0th": {
    "Make": "Meta AI",
    "Model": "Ray-Ban Meta Smart Glasses 2",
    "Orientation": 1
  },
  "Exif": {
    "ColorSpace": 1,
    "PixelXDimension": 3024,
    "PixelYDimension": 4032
  },
  "GPS": {}
}
Local vs. Server: The Mental Model
This is the same intuition shift I had with EDA, just applied to images.
1. Traditional Server Converter (Synchronous and Risky)
Imagine sending your photo to a stranger's darkroom. You upload, you wait, you hope they do not keep a copy, and if their server is down you are stuck.
[Your Phone] ---> (POST /convert, 8 MB JPG) ---> [Server] ---> (GPS kept?) ---> [Instagram]
                                                      |
                                                (privacy risk, queue, cost)
If the server leaks GPS or compresses badly, your Story is ruined and your location is already out there.
2. Local Browser Converter (Asynchronous and Private)
Now imagine a darkroom inside your phone. You drop the photo on a table, it gets fixed right in front of you, and you hand carry the result to Instagram. No one else touches the negative.
[Your Phone] ---> [ FileReader -> Canvas -> piexif ] ---> (stamped 3024×4032, GPS {}) ---> [ Share to Instagram Story ]
                        |
                  100% in-memory, no fetch
If the browser crashes you just reload. No queue, no leak, no bill.
That is why sw.js caches only the app shell plus piexif.js and fonts, never the images.
How Format Press Solves the Instagram Story Problem
Ray-Ban Meta Stories look good because they are portrait, edge to edge and horizon straight. Phone photos are the opposite: random orientations, mixed ratios, GPS tagged.
With cover plus gyro correction:
- No squash:
covercenter crops viaMath.max(dw/iw, dh/ih)instead of stretching withdrawImage(0,0,w,h). - No sideways: all 8
Orientationvalues are mapped tosetTransform()(for example6 = 90° CW). - No bars:
3024×4032 (3:4)and the optional1080×1920 (9:16)fill Stories after Instagram's auto fit. Asafe-areaoverlay (top/bottom 18%) shows where Instagram's UI will sit. - No leak:
exif.GPS = {}plus strippedMakerNote/Lens*before you post.
Workflow that actually feels like glasses:
- Pick any JPG, you will see Source ready
- Choose
MetaorStory, setCover, nudge±15°for vibe - Hit
Stamp output, you getStory ready 1080×1920 - Hit
Save / Sharethen Instagram -> Story and add stickers
Tip: shoot slightly tilted at head level. Auto gyro fixes the horizon, and a manual +3° keeps the POV feeling natural. That is the whole gyro tilt magic.
Why Choose This Approach?
What I learned from building it:
- Privacy by default:
FileReaderplusCanvaspluspiexifnever callfetchwith image bytes. Searchindex.htmlforfetchand you will find zero matches for images. - Determinism: Same input plus same
fit/tilt/presetgives you the same bytes and the same Base64. Great for QA that validatesModelandPixelXDimension. - Zero infra: Single
index.html(orstyle.css/app.jssplit) and you can just open and run it. Nonpm, no backend to keep alive. - Teachable: No black box SDK. You can actually see the
setTransformmatrix, thetoBlobvstoDataURLmemory tradeoff and theSRIhash. - PWA offline:
manifest.jsonwithdisplay: standaloneplussw.jsmakes it installable and usable on a plane after the first load.
The Trade-Offs (What to Watch Out For)
- JPEG only: PNG/WebP/HEIC renamed to
.jpgwill still fail atpiexif.load. That is intentional, but it can be confusing without the15 MBplus type guard message. - One at a time: No batch queue yet. Large
toBlobplus Base64 still holds about 2x the image in memory, so that is why there is a15 MBcap. - EXIF subset: Only the tags in
buildExif()are handled.ICC/XMPprofiles are dropped on re-encode. Fine for Stories, not ideal for print. - Canvas vs. accuracy:
covercrop is center only. No drag to reposition and no smart face detection crop. AndtiltDegis just a simplerotate()around the center, so it can clip corners at±15°(we keep it subtle for that reason). - CDN trust: First load needs
cdnjsplusGoogle Fonts. SRI (sha384-yk/k1…) plusonerrorfallback tounpkghelps, but for air gapped use you would need to self host. - Not a real device: Stamping
Meta AIis for testing only. Do not use it to misrepresent provenance. That is why there is a first visitlocalStorage.formatPressConsentmodal and a footer disclaimer.
What I Got to Learn
This tiny tool punched way above its weight:
- EXIF is a second image: Orientation
1 to 8is not just metadata trivia, it actually is the image. Ignore it and you ship sideways Stories.piexif.loadtodumptoinsertis the whole lifecycle. - Canvas is a state machine:
setTransform()resets the matrix, whiletranslate()androtate()compose it. Order matters a lot: orientation first, then manual tilt, thendrawImage(). toBlobbeatstoDataURL:toDataURLis sync and it bloats memory with base64.toBlobplusblobToDataURL()viaFileReaderis async and much cheaper for 12 MP photos.covervsstretchis UX, not math:stretchis one line but it ruins faces.coverneedsscale = max(dw/iw, dh/ih)and centeredx/y. Extra work, but totally worth it for Stories.- Privacy is a feature:
exif.GPS = {}is one line that actually matters when you post publicly. Local first is not just ideology, it saves you GDPR headaches. - PWA is 10 lines that matter:
manifest.jsonplussw.jswith stale while revalidate for the CDN and never for images makes a lab tool feel like a real app. - SRI is free security: One
integrity="sha384-…"pluscrossorigin="anonymous"stops a hijacked CDN from shipping a badpiexif.js. - Small UX wins stack up:
15 MBguard plus.errorshake,Revert to source,safe-areaoverlay,Story vs Metapreset,Copy Base64fallback toexecCommand, keyboardEnter/Spaceon dropzone. Each one is like 5 lines, together they make it feel polished. - Single file has a cost:
index.htmlis great for open and run demos, but line numbers rot inREADME. Splitting tostyle.cssandapp.jswith// @ts-checkplusJSDocgives you types without a build. - Shipping tiny beats perfect: A footer disclaimer plus
noindexplus consent modal is more responsible than a perfect pipeline stamp that pretends to be Meta.
Wrapping Up
Building meta-gyro-tilt was the opposite of my EDA journey. Instead of connecting microservices across languages, I shrunk everything into one browser tab. No bus, no broker, just FileReader -> Canvas -> piexif.
Both taught me the same thing: boundaries matter. In EDA, services talk via events. In Format Press, the boundary is the browser sandbox and nothing leaves it.
If you want to fake a Ray-Ban Meta Story, test a Model aware API, or just see what your iPhone's Orientation: 6 actually does, give it a try. Open the live demo, drop a JPG, play with Cover plus +3° tilt, and share to Story. The code is open on GitHub if you want to poke around or fork it.
It is tiny, unofficial and for testing only, but it is the most fun I have had with a <canvas> in a while.
Tried it? Built something similar with WebGL or WASM? I would love to hear how you handle cover crops and ICC preservation, let me know!